How to create and manage multiple stores in Magento 2?

Magento 2 is one of the most advanced and flexible e-commerce systems on the market. Its modular architecture and rich functions make it an ideal solution for companies that want to manage multiple stores from one administration panel. Having multiple stores can be beneficial for a variety of reasons, such as targeting different markets, offering diverse product assortments, or supporting different languages and currencies. In this article, we will look at how to create and manage multiple stores in Magento 2 step by step.
Benefits of Multi Store Management in Magento 2
Before getting into the technical details, it's worth understanding the benefits of managing multiple stores:
Central management:
Possibility to manage multiple stores from one administration panel.
Varied offers:
Possibility to offer different products, prices and promotions depending on the store.
Personalization:
Better personalization of content and offers for different customer segments.
SEO optimization:
Ability to create separate SEO strategies for different stores, which can improve visibility in search results.
Scalability:
Easily add new stores as your business grows.
Step 1: Configuring the Store Hierarchy
Magento 2 allows you to create a structure based on three levels:
Global
Website
Store
Store View
Global is the highest level that includes all sites, stores, and store views. It contains global settings that affect the entire Magento installation.
A website is a group of stores that can have its own settings, such as payment configuration, shipping, users, and more.
Each site can contain multiple stores.
A Store is a group of store views that share the same product catalog. Stores within one website may have different layouts and content, but will share the same product range.
Store View is the lowest level and is typically used to support different languages and currencies.
Each store can have multiple store views.
Creating a new website, new store or new store view in Magento 2 is simple and intuitive. With a few clicks, you can add a new website, store or view to your store structure, which allows for even better management and personalization of the offer for various customer segments.
Step 2: Create a new site
To create a new site, follow these steps:
Log in to the Magento administration panel.
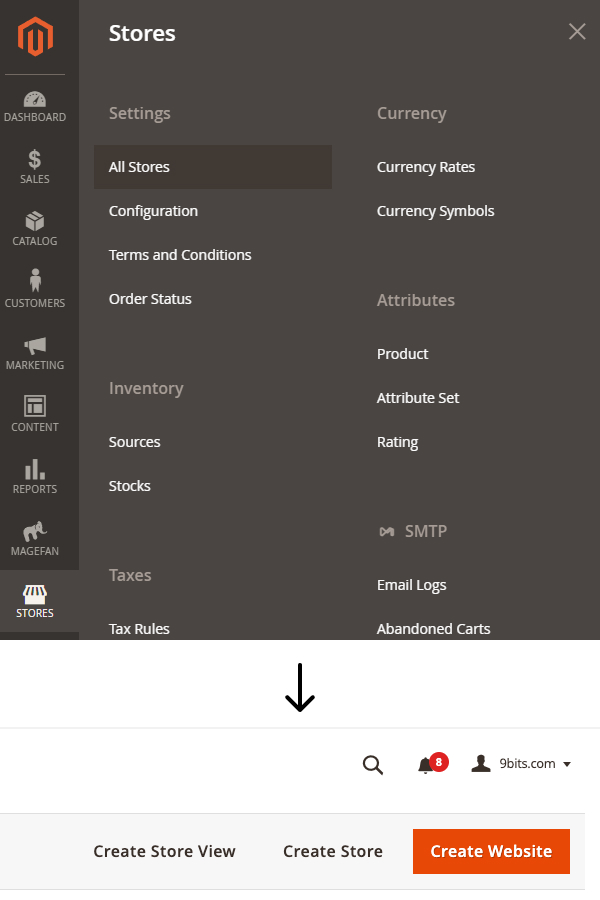
Go to Stores > Settings > All Stores.
Click "Create Website".
Complete the form:
Name: The name of the site.
Code: The unique code of the website (e.g. second_website).
Sort Order: Display order in the administration panel.
Save your changes.
Step 3: Creating a new store
To create a new store, follow these steps:
Go to Stores > Settings > All Stores.
Click "Create Store".
Complete the form:
Website: A previously created website.
Name: The name of the store.
Root Category: The root category that will be used by this store.
Save your changes.
Step 4: Create a new store view
To create a new store view, follow these steps:
Go to Stores > Settings > All Stores.
Click "Create Store View".
Complete the form:
Store: The store this store view will belong to.
Name: Name of the store view (e.g. English).
Code: The unique code of the store view (e.g. English).
Status: Set to Enabled.
Sort Order: Display order in the administration panel.
Save your changes.
Step 5: Configure store settings
After creating new stores and store views, you need to configure the appropriate settings.
Have to do:
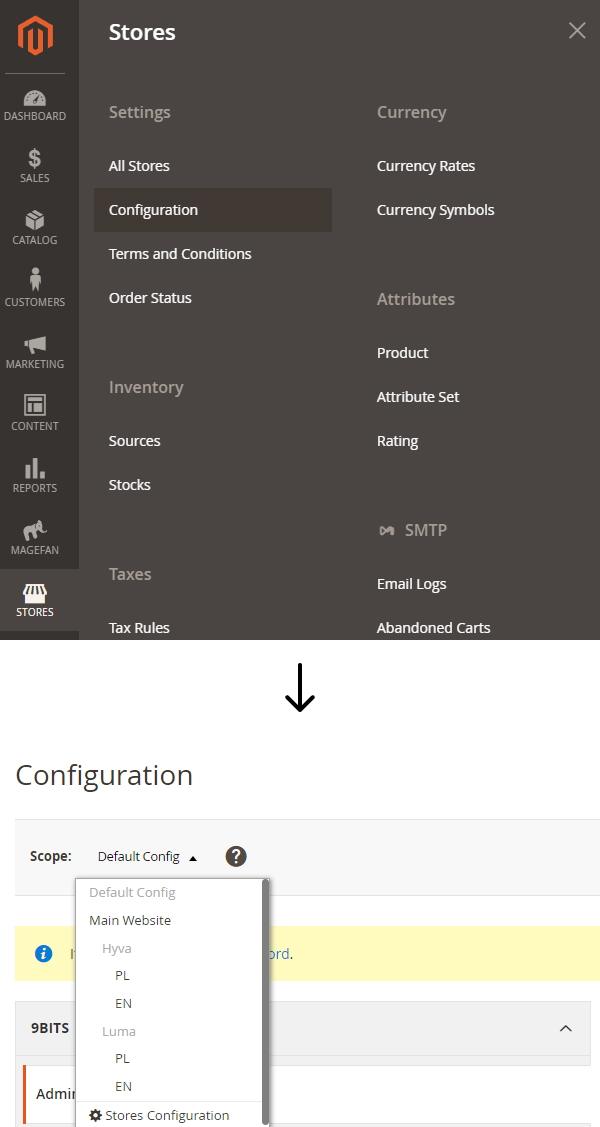
Go to Stores > Configuration.
Select a store or store view from the “Scope” drop-down menu
Configure settings specific to the selected store or store view.
You can set different configurations for each site, store and store view, such as:
General settings (language, time zone, units of measurement)
Product catalog configuration
Payment and shipping settings
Tax and currency setup.
Step 6: Product range management
In Magento 2, all stores within one website can share the same product catalog. However, you can adjust the visibility of products in individual stores and store views.
Have to do:
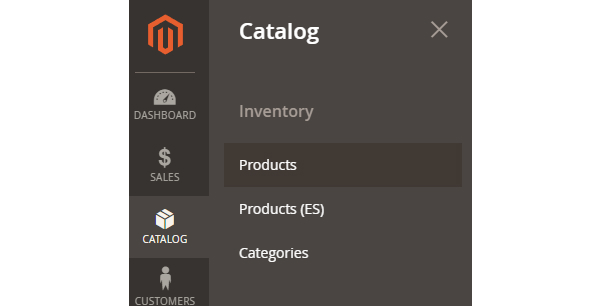
Go to Catalog > Products.
Select the product to be customized.
Go to the "Websites" section and select the stores where the product is to be available.
Save your changes.
Step 7: Content management
Magento 2 allows you to customize the content on pages depending on the store and store view. You can create different CMS pages, static blocks and layouts for different stores.
Have to do:
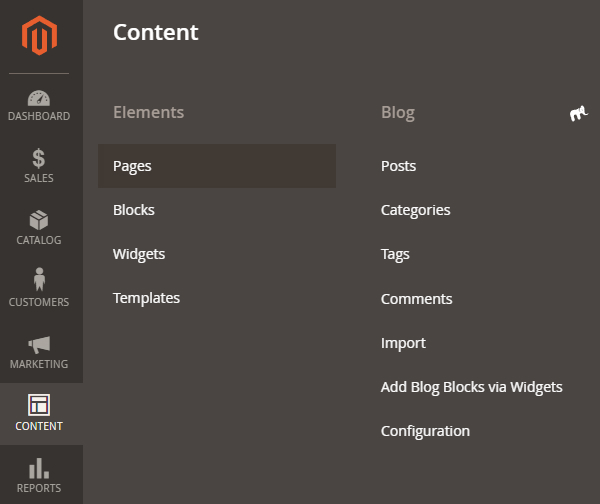
Go to Content > Pages.
Create or edit a CMS page.
Assign the page to the appropriate store or store view.
Save your changes.
Summary
Creating and managing multiple stores in Magento 2 may seem complicated, but with the right knowledge and approach, you can effectively manage multiple websites from one administration panel. It is crucial to understand the Magento 2 hierarchy and precisely configure individual elements. Thanks to this, you can offer diversified offers, better target customers and effectively scale your business. Magento 2, as an advanced e-commerce tool, offers enormous opportunities that, when properly used, bring tangible benefits.